
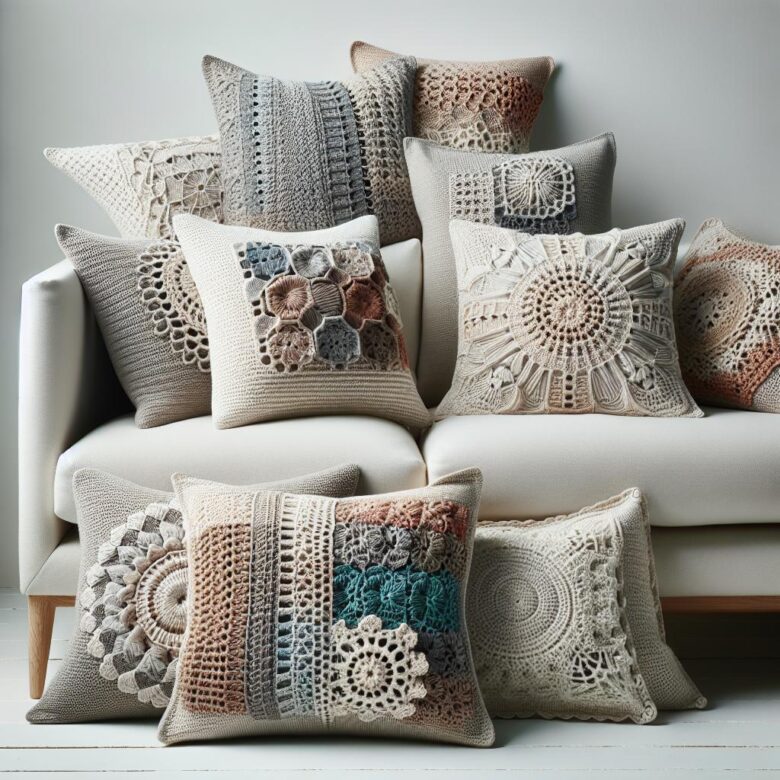
A textured crochet pillow cover needs more than an attractive stitch repeat. Raised stitches can pull a panel inward, heavy yarn can encourage sagging, and an unstable closure can distort an otherwise neat cover. Planning the fit, fabric and construction together helps the finished cover keep its shape while remaining removable and practical to clean.
The stitch recipes below use US crochet terminology and can be scaled to fit different inserts. Abbreviations include chain (ch), single crochet (sc), double crochet (dc), front-post double crochet (FPdc), back-post double crochet (BPdc) and front-post treble crochet (FPtr).
Plan the Cover Around the Pillow Insert
Measure the actual insert from seam to seam while it is lying naturally. Do not rely only on the package size, and do not flatten or compress the insert while measuring.
- For a springy or slightly open fabric: A cover made a little smaller than the insert can produce a tailored fit. About half an inch of negative ease is a reasonable starting point for many sofa pillows, but confirm it with a blocked swatch.
- For dense cotton or firm basketweave: Work close to the insert dimensions because the fabric may have limited stretch.
- For a very full insert: Avoid aggressive negative ease. Too-small covers can strain seams, flatten bobbles and make the corners look distorted.
- For pillows used behind the head or back: Reserve deep bobbles or large cables for one decorative face. A flatter back is usually more comfortable.
A textured front paired with a plain single-crochet, half-double-crochet or linen-stitch back is often the simplest construction. It reduces yarn use, makes the closure easier to install and keeps the most pronounced texture on display.
Swatch, Block and Calculate the Panel Size
Gauge from a plain stitch does not predict the width of a cable, waffle or bobble panel. Crochet a swatch large enough to contain several complete repeats, including any planned edge stitches. Wash or block it using the same method intended for the finished cover, let it dry completely and then measure the central area.
- Count the stitches across a measured section and divide by its width to find stitches per inch.
- Multiply the target panel width by the stitches per inch.
- Adjust that number to the nearest complete pattern repeat.
- Repeat the calculation with rows per inch for the panel height.
- Include the width of any border in the final dimensions rather than adding it as an afterthought.
For example, if a blocked swatch measures 4 stitches per inch and the target width is 17.5 inches, the initial calculation is 70 stitches. A pattern using a multiple of three could be adjusted to 69 or 72 stitches. Choose between them by considering stretch, the width of the border and how firmly the insert is filled.
Cables and post-stitch patterns often draw inward more than their surrounding fabric. Measure across the entire cable arrangement rather than calculating from one plain section.
Check Recovery Before Starting the Full Panel
Gently stretch the blocked swatch horizontally, release it and measure it again after it rests. If it remains noticeably wider, try a smaller hook, a more firmly twisted yarn or a stable single-crochet border. The fabric should bend comfortably without showing large gaps or feeling rigid.
Estimate Yarn From the Swatch
Weigh the dry swatch and compare its area with the planned panel area. A 6-inch square swatch covers 36 square inches. An 18-inch square panel covers 324 square inches, or nine times that area. If the swatch weighs 18 grams, the same stitch pattern would require approximately 162 grams for the front panel before accounting for borders, seams and additional swatching. Calculate a plain or differently textured back separately.
Choose Yarn and Hook Size for Clear Texture
The yarn label provides a starting hook size, not a required one. Make two swatches with nearby hook sizes and compare definition, flexibility, gaps and recovery after blocking.
| Yarn type | Useful qualities | Limitations to consider |
|---|---|---|
| Smooth, plied wool or wool blend | Good rebound and clearly defined post stitches | Care requirements vary; some wool can felt with heat or agitation |
| Cotton or cotton blend | Crisp bobbles and geometric texture; comfortable in warm rooms | Pure cotton can become heavy and may not spring back as readily |
| Firmly twisted acrylic | Accessible, lightweight and available in many colors | Heat can permanently change the fabric; follow the yarn care label when blocking |
| Chenille, roving or fuzzy single-ply yarn | Soft surface | Can obscure cables and post stitches, make errors difficult to see and show wear at raised points |
A smooth, light-to-medium color usually displays shadows and stitch structure more clearly than a very dark, highly variegated or fuzzy yarn. This is a design choice rather than a rule, but it matters when the texture is intended to be the focal point.
Scalable Texture Patterns for Pillow Fronts
In the following recipes, turning chains do not count as stitches. Keep the first and last stitches firm and count every row; a missing edge stitch can gradually turn a square panel into a trapezoid.
Offset Bobble Grid
This pattern places bobbles on a stable single-crochet background. Each bobble counts as one stitch and is worked from the wrong side so it projects toward the right side.
Five-double-crochet bobble: Yarn over, insert the hook in the indicated stitch, yarn over and pull up a loop, then yarn over and pull through two loops. Repeat that partial double crochet four more times in the same stitch. Yarn over and pull through all six loops on the hook.
- Chain any multiple of 6, then add 2. Single crochet in the second chain from the hook and across. The stitch count will be a multiple of 6 plus 1.
- Plain row, right side: Ch 1, turn and sc across.
- Bobble row A, wrong side: Ch 1, sc in the first 3 stitches, bobble in the next stitch, then repeat sc in the next 5 stitches and bobble in the next stitch until 3 stitches remain. Sc in the final 3 stitches.
- Work 3 plain sc rows.
- Bobble row B, wrong side: Ch 1, sc in the first 6 stitches, bobble in the next stitch, then repeat sc in the next 5 stitches and bobble in the next stitch until 6 stitches remain. Sc in the final 6 stitches.
- Work 3 plain sc rows and repeat the two bobble sections.
If the bobbles lean or disappear into the fabric, make sure each partial double crochet is drawn to the same height. A smaller hook may improve the background, but an excessively tight hook can make it difficult to close the bobbles.
Waffle Stitch
Waffle stitch creates a deep grid without separate motifs. It uses more yarn and produces a thicker fabric than plain double crochet, so calculate yarn from the actual swatch.
- Chain any multiple of 3, then add 2.
- Row 1: Dc in the third chain from the hook and in every chain across.
- Row 2: Ch 2 and turn. Repeat FPdc around the next stitch, then dc in the next 2 stitches across.
- Row 3: Ch 2 and turn. Repeat dc in the next stitch, then FPdc around the next 2 stitches across.
- Repeat Rows 2 and 3.
Insert the hook around the post rather than into the top loops for every FPdc. Missing a post stitch interrupts the grid and can change the width. Finish the panel with a firm border if the side edges curl.
Basketweave Texture
Basketweave alternates groups of front- and back-post stitches to create a woven appearance.
- Chain any multiple of 6, then add 2. Work dc in the third chain from the hook and across.
- Rows 2–4: Ch 2 and turn. Repeat FPdc around the next 3 stitches and BPdc around the next 3 stitches.
- Rows 5–7: Ch 2 and turn. Repeat BPdc around the next 3 stitches and FPdc around the next 3 stitches.
- Repeat Rows 2–7.
Do not work into the top loops after completing a post stitch; each post stitch replaces the corresponding stitch. Basketweave can become very dense, so choose a hook that allows the fabric to flex.
Four-Stitch Cable Panel
A narrow cable can be centered on a double-crochet panel or repeated with plain columns between cables. Begin with a double-crochet setup row and mark the four posts that will form each cable.
- Regular right-side cable row: Dc to the marked section, FPdc around each of the 4 cable posts, then dc across.
- Wrong-side row: Dc to the cable section, BPdc around each of the 4 cable posts, then dc across.
- Crossing row: Dc to the cable. Skip the first 2 cable posts and FPtr around each of the next 2 posts. Working in front of those stitches, FPtr around each of the 2 skipped posts. Continue in dc.
- Work a wrong-side row with BPdc around the 4 cable stitches.
- Work 2 regular right-side cable rows, each followed by a wrong-side row.
- Repeat from the crossing row.
Draw each FPtr loop up to the full row height before completing the stitch. If the crossing puckers sharply, the treble stitches are probably too short or too tight. The four crossed post stitches replace four stitches; do not work into their top loops again.
Select a Construction and Closure
| Construction | Advantages | Points to watch |
|---|---|---|
| Envelope back | No hardware and easy access to the insert | Needs enough overlap and stable opening edges to prevent gaping |
| Button band | Decorative and adjustable if several buttonholes are used | Buttonholes and buttons need reinforcement; raised front texture should not crowd the band |
| Zipper | Close fit with a discreet opening | The crochet edge must be stabilized so it does not stretch while the zipper is sewn |
| Fully seamed cover | Simple construction with no opening treatment | The insert cannot be removed easily for laundering |
Calculate an Envelope Back
For a vertical envelope opening, each back piece should equal the full cover height. The combined widths must equal the cover width plus the desired overlap.
For an 18-inch cover with a 4-inch overlap, each identical back piece would be 11 inches wide: 18 plus 4, divided by 2. An overlap of approximately 3–5 inches is a practical starting range for many common sofa pillows, but test it around the actual insert before completing the outer seams.
Finish the two opening edges with tight single crochet, ribbing or a slip-stitch border before assembly. Place both back pieces over the wrong side of the front, with the finished edges overlapping, and check that the combined back matches the front on all four sides.
Install a Zipper Without a Wavy Edge
- Finish the opening edges with one or two firm rows of single crochet or sew narrow fabric stay tape to the wrong side.
- Block both edges to the intended length and allow them to dry completely.
- Baste the opening closed in its finished position.
- Center the closed zipper beneath the opening and pin or clip it without stretching the crochet.
- Hand-sew each side of the zipper tape with small backstitches, keeping the thread away from the teeth.
- Remove the basting and check that the zipper opens freely before seaming the remaining sides.
If the zipper is shorter than the pillow edge, seam the unused sections at both ends first. Avoid pulling the crochet to match a longer zipper because the opening will ripple when released.
Buttons should be sewn securely through a reinforced band. For pillows used around young children or pets, consider an envelope or zipper instead of detachable decorative hardware.
Block and Seam Without Flattening the Texture
Block the front and back pieces to matching dimensions before assembly. Shape the background fabric rather than pressing down on raised bobbles and cables.
- Wet blocking: Often suitable for washable cotton and many natural-fiber blends. Support the wet panel, shape it flat and let it dry without hanging.
- Wool: Follow the yarn label and avoid unnecessary heat or agitation.
- Acrylic: Check the care instructions before using steam. Heat can permanently relax or damage acrylic fibers, and a hot iron should never touch the crochet.
Before seaming, place markers at each corner and at the midpoint of every edge. Add more markers along long sides. This keeps one panel from being stretched to fit the other, especially where stitch edges are joined to row ends.
- Mattress stitch: Work from the right side through corresponding bars just inside each edge. Pull the seam closed gradually instead of tightening every stitch immediately.
- Slip-stitch seam: Hold right sides together and slip stitch through both layers, then turn the cover right side out. Keep the slip stitches loose enough that the seam does not shorten.
- Whipstitch: Useful for dense fabrics and corners, provided the stitches are evenly spaced and not pulled tight.
Single crochet joins create a visible ridge and can be attractive when used intentionally, but they are bulkier than mattress stitch or slip stitch. Place a decorative join consistently on all four sides rather than using it to compensate for mismatched panel sizes.
Troubleshoot Common Texture and Fit Problems
| Problem | Likely cause | Adjustment |
|---|---|---|
| Finished panel is narrower than expected | The textured repeat draws in more than the gauge swatch showed | Swatch the complete repeat, add another repeat or plan a measured border |
| Bobbles appear on the wrong side | They were worked from the display side | Work bobble rows from the wrong side or gently push each bobble through |
| Waffle stitch looks flat | Post stitches were worked into top loops, the hook is too large or blocking was too aggressive | Work around the posts, compare a smaller hook and reshape without pressing the relief |
| Cables pucker at each crossing | The crossed post stitches are too tight or too short | Lengthen the working loops and use FPtr rather than shorter post stitches for the crossing |
| Border ripples | Too many border stitches were added | Remove the border and distribute fewer stitches evenly, checking the panel on a flat surface |
| Border cups inward | Too few border stitches or a much smaller hook was used | Add stitches at regular intervals or use a slightly larger hook for the border |
| Envelope opening gapes | The overlap is too shallow or the opening edges stretch | Increase the overlap and stabilize both opening edges |
| Zipper edge waves | The crochet was stretched during installation | Block and stabilize the opening, then reinstall the zipper while the edges are relaxed |
| Corners look loose | The cover is too large for the insert or the seam allowance is bulky | Check the finished dimensions, reduce seam bulk and use a fuller insert only if it does not strain the fabric |
Final Checks Before Assembly
- Confirm the front and back match after blocking, not only before it.
- Count stitches and pattern repeats along corresponding edges.
- Finish and stabilize envelope, button or zipper edges before sewing the outer seams.
- Make sure the closure is wide enough to remove the insert without forcing it through the opening.
- Keep the yarn label or record the fiber and care instructions for future washing.
- Wash removable covers according to the yarn label, reshape them while damp and allow them to dry fully before replacing the insert.
A successful textured pillow cover combines a repeat that suits the yarn with a measured fit and stable finishing. Swatching the complete texture, accounting for the border and assembling blocked panels will prevent more problems than trying to correct sagging or distorted seams after the cover is finished.

The Cozy Stitch Editorial Team creates practical crochet guides for beginners and everyday makers. Our content covers stitches, yarn and hook selection, pattern reading, troubleshooting, amigurumi, handmade gifts, and functional projects for the home. Guides are reviewed for clarity, usefulness, and accuracy and may be updated when improvements are needed.